Roblox has the option of changing the hairstyles. In the following article, I have shared a detailed guide on How to Make Hair in Roblox and have shared how to make Roblox hair with different hairstyles in 3D Animation.
One of the Best Softwares to make different hairstyles on Roblox is Blender, with a 3D animation software that has open-source, motion tracking, rendering, creating a 3D animation model gear.
Table of Contents
How to Make Hair in Roblox
Gamers don’t like to use the basic avatars on Roblox and are always looking forward to keeping changing the hairstyles using different software. Blender is very helpful in creating customized hair in Roblox. And the best thing is that only three steps are required for making Roblox hair. Basic things like learning how to make curves, then changing them to meshes, and then unwrapping of UV.
Also, Check List of ALL Roblox Hair Codes
Steps to Make Hair in Roblox
-
Roblox Studio will initiate an Export and import of Objects to Blender.
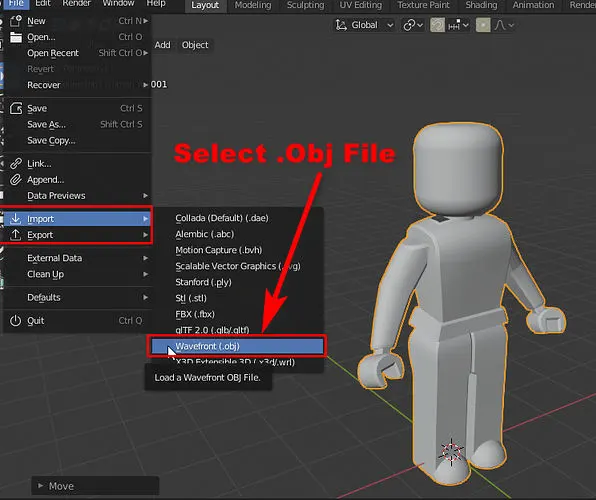
Start by loading your character in the Roblox Studio with your username. In the Roblox Studio, from the toolbar click on the Plugins. In case where the plugin is not available, start by clicking on View, then move to the Toolbox from there select Plugin and now you can load your character by typing your username.
To Export objects in Roblox Studio, follow these steps:
- In your, Explorer go to View, and in the right panel your username appears, Click on it.
- Delete all the things except the Head and the Mesh Option inside it.
- Now on the head, Right–Click and from the list that appears choose the ‘Export Selection’ and save the file under the name ‘.obj’.
- Then on your Blender press X on all the objects, you wish to delete and then press Enter. Now click on the file and select the Import option {.obj}.
- If you wish to Move the head Press Alt+G or by clicking on the head and then choosing the object, set the origins and then Origin to Geometry.
Looking to find a way to change your display name? Check out our guide How to Change Username on Roblox
-
How to add curves in Roblox Hair?
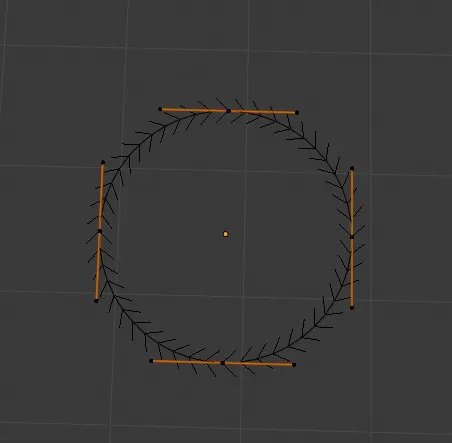
- Start by choosing the head, then use Add > Curve > Path and Add > Curve > Circle. Move to the right bottom panel where you can spot a green curve symbol and select it.
- Now click on Geometry and as the Bevel object select your Circle of Bezier.
- This will show you a tunnel appearing above the head of your Avatar. Now to get to the edit mode Click on the bezier circle. You can change the Loops Shape by applying the Mirror Modifier to get the most perfect and to your desired shape.
- To join the objects, in the right-side panel, Enable Clipping. To edit your Hair curves click on the Vertices. To scale them press Alt + S. To move them in all Directions press Ctrl+T. use the Shit button to Copy where ever it is required.
Free Roblox Jailbreak Codes for you to excel in the game fast.
-
How to change the Curves into Meshes
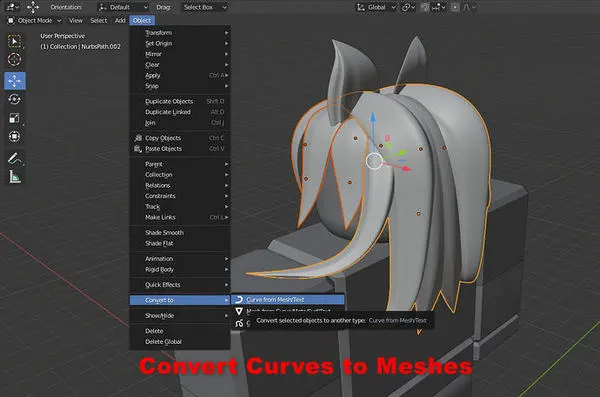
- When the gamer doesn’t like the curve hair and needs to disable that they will need to change it to meshes.
- To do so Click on ‘Objects’ then ‘Convert to’ and then finally click on ‘Meshes from Curves’.
- Now decide the edges you want to work on and Press Edge Select. To click on one edge of the hair and the whole border press Alt-click and finally to close down all the openings press F
-
Check if it requires any changes:
- To check that everything is good, Enable face Orientation from Viewport Overlays. There are chances of two colors appearing and each color depicts a different thing.
- If the whole this is Blue it means you have successfully done it without any mistakes. And if red color appears don’t worry it just means that you will need to take care of some endings that are incomplete, then go to the ‘Edit mode’ in it select the ‘Red portions’, from there open ‘Mesh’ and select ‘Normals’ and finally click on ‘Flip’.
We have covered a detailed guide on How to Fix Roblox Error Code 6
-
Trim down the edge of the loop
- Start by checking if the Edge select is enabled. Then in the Edit Mode, On an edge Press Ctrl + Alt. Now start on Select then from there go to Checker Deselect and this will highlight on all second edges.
- Again move to Select and click on Select Loops then choose Edge Loops from it. To delete the edge loops Press X. Now on each portion of hair this step needs to be done You can see the number of triangles in the lower right corner you will be able to see the number of triangles and the maximum is 10,0000.
-
Choosing the Color of Hair and giving it the needed texture
- Now for this step, you will need to Download Paint.net. before starting check whether the Edge Select is Enabled.
- You can now color your hair and add texture to it. Make sure to save the image as a jpeg file.
- Now in the blender go to UV Editing and select on the Paint.net folder to open it.
- Next, go to ‘Shading’, navigate to ‘Add’, and then Search for Image Texture. Now mix the Image texture to the base color then select your desired image.
- Now go to the UV Editing and for selecting each strand at a time click on them and Press L.
- On the grids to move Along the texture, use the keys R to Rotate and S to Scale.
-
Importing of the file to Roblox Studio
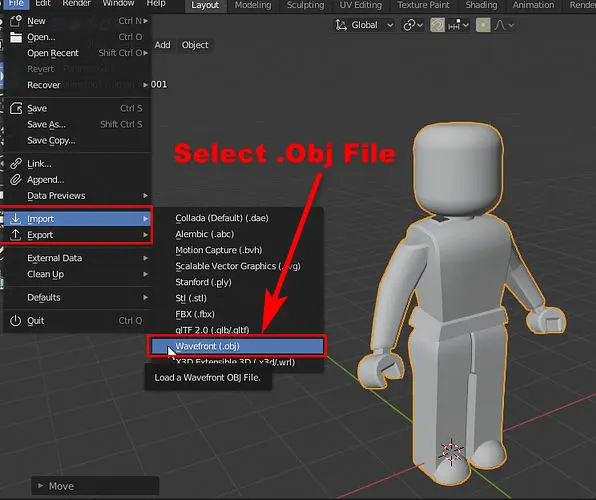
- Start by selecting File, then click on the Export image as Wavefront (.obj) and then turn on the Roblox Studio.
- Now Right-click this will insert the object and then the Mesh part.
- Then Open the Explorer and Properties. In Mesh File Selection and select the Blender’s image.
- This successfully imports the file.
Frustrated with error 610? Learn how to fix Roblox Error Code 610
-
How to add the Body Parts and the Save it on Roblox
- You start by loading your avatar and save it as R6. Remove all the extra gears on the head including its hair.
- Now on the Head click on hair Attachments and a sphere in green color will b visible. The next step is to copy and paste it on the Hair.
- On the home adjust the Green Sphere as required.
- Right Click on Character and select Insert Object, choose Accessory, and Drag and Drop the folder of hair in the section of accessories.
- These steps will give you the hairstyle texture and color you choose for your avatar.
How to Wear Two Hairs at Once on Roblox?
10 Awesome Roblox Hair Codes
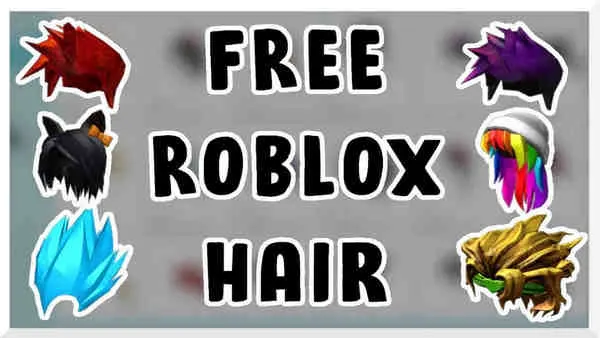
Use the following codes in Roblox to have different Hair types :
| Beautiful Hair for Beautiful People | 16630147 |
| Cinnamon Hair | 13745548 |
| Beautiful Brown Hair for Beautiful People | 17877340 |
| Long Pastel Hair | 727320877 |
| Golden Hair | 13476917 |
| Long Twilight Hair | 878922157 |
| Pastel Hair | 727320511 |
| Blue Anime Girl Hair | 164482409 |
| Dark Galaxy Boy Hair | 553859958 |
| Ninja with the Cool Blonde Hair | 435111975 |
How to Earn Robux by Selling Hair?
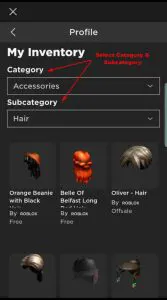
Roblox allows its members with an account on Robux to trade their items and earn through it. It is only available for members with a paid membership account on Robux. Users start the trade by uploading their items to the Avatar Shop on the catalog page. To buy it just press on the three dots that are present upward to the Price Box and then click on ‘Buy Now
Looking for a way to use bubble chat? Read Enable Bubble Chat in Roblox guide here.
In this article, I have jotted down the basic steps required to get the desired hair on your Roblox Avatar. This is achievable with a software called Blender. This software will add curves in Roblox Hair, change the Curves into Meshes, Trim down the edges of the loops, helps in changing the Color of Hair, and gives it the needed texture.


![Roblox Jailbreak Codes & ATM Updated List [2023] Roblox-Jailbreak-Codes-1](https://techzpod.com/wp-content/uploads/2021/04/Roblox-Jailbreak-Codes-1.webp)
![How to download Roblox on PS4? [Easy way to play Roblox on Playstation] Roblox-on-PS4](https://techzpod.com/wp-content/uploads/2021/06/Roblox-on-PS4-1.webp)
Leave a Reply