Fix VR Black Screen
Many prominent VR headsets like Sony PlayStation VR, HTC Vive, Oculus, and Valve Index work incredibly well and are the pieces of technology that are being loved by this generation. But sometimes, because of some bugs and glitches, these VR headsets might not work properly.
If you are also facing the same kind of error that your VR headset is not functioning properly, then you don’t have to worry as we have got all the ways to fix this error in VR headsets.
But before that, you need to know why your VR headset is not working. So, without wasting any time, let us get to that first.
Also Check: Is Roblox Down?
Table of Contents
Why are you seeing a black screen on your VR?
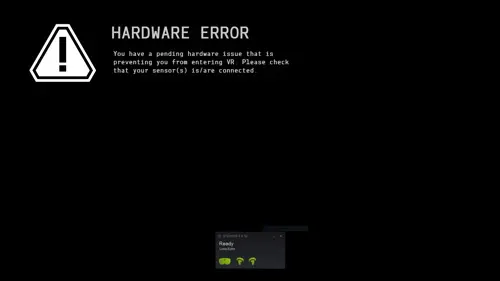
We understand how frustrating it can be when you buy the VR for your entertainment purpose, but all you see are errors. As you wear the VR for playing a game, you only hear some noises but cannot see anything other than a black screen, and immediately after that, you are kicked out of the game and warned to check the cable connection of your VR headset.
There are mainly three reasons why you see this error. They are headset cable connection problem, wrong camera placement of the heads, and the VR not detecting headset. These are the most common and majorly occurring reasons behind this error on VR.
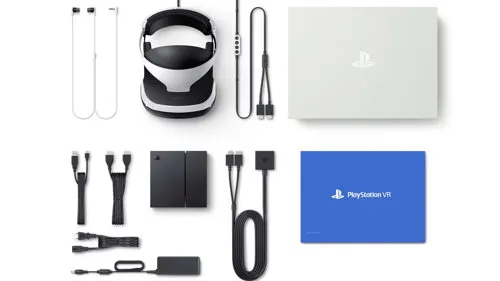
There are a few things you should know, the first thing you need to do after buying a VR headset is removing the sticker from the headset and then checking if sufficient light is passing or not. After that, you need to make sure whether the camera is able to see all the lights including the dimmed ones, or not. This type of problem can be seen mainly in the case of PlayStation VR headsets.
Then the next thing you need to do is you have to check the cable connection of the headset. This happens when the facial interfaces of the cables are loosely connected during the shipping process and due to this, you will face a sudden shut down of your VR screen.
Now let us see what are the ways you can use through which you can fix the VR black screen glitch.
How can I fix the black screen on my VR?

This glitch can be seen in all of the VR headsets. It doesn’t matter if the VR headset you are using is Oculus Rift S or HTC Vive, the solution for fixing the black screen remains the same.
Before we start with guiding you on the ways of fixing the error, there are two things you need to check if sufficient power is being supplied to your VR headset. Also, make sure that the Windows you are using is 10 because VR software is only compatible with Windows 10. You need to update to Windows 10 in order to use the VR headset.
Now let us quickly get to the ways through which we can get the VR Black screen glitch fixed.
Also Check: How to Fix ROBLOX Error Code 277?
-
Allowing the Computer to Load up Power
This solution can fix many other errors such as three-dot loading screens, sensors not being able to track headsets, and also no display port connection, etc. This is also the easiest and the most effective solution. So, pay attention to the steps.
This is needed because your computer disables some of the devices in order to save power supply and for this reason, the plugging-in VR will shut down without prior notice and you will face this glitch.
This solution has two parts.
You just have to follow the below steps to solve this issue:
Step 1: You first have to open the Device Manager.
Step 2: Then, select Host Controller USB Driver.
Step 3: Choose to see the Properties of that Driver.
Step 4: Next, click on “Power Management”
Step 5: You will see an option that says: the computer will be turned off to save the power supply. Uncheck that.
Step 6: Then, click “Okay” to save the changes.
You need to do this for every USB driver present in your computer but don’t do this for the Rift S USB Hub (if you are using Oculus Rift S). Also, you don’t have to restart the pc every time you do this.
Now coming to the second part, in this you need to load up power management. You should only get to these steps if you have completed the above steps.
Below are the steps to be followed:
Step 1: Open the Windows search, and search Edit Power Plan.
Step 2: Then go to Advanced power settings.
Step 3: Then go to USB Settings and then to USB Selective Suspended settings
Step 4: Here, disable the USB suspended settings and then click on apply.
Step 5: Save these changes.
If the problem persists, follow the next solution.
-
Restarting the software
There was a new firmware update that started causing problems in the VR headset.
Just follow the below steps to fix these problems:
Step 1: Go to the settings of the VR software
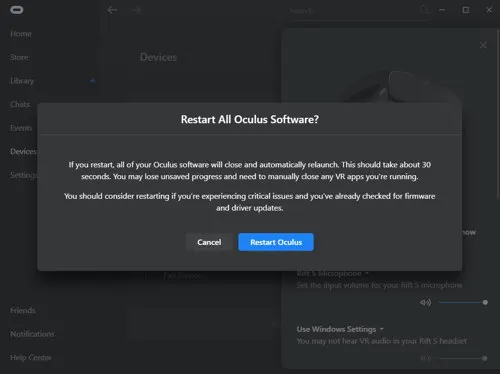
Step 2: Then select Beta (in case of Oculus) and click on “restart Oculus” (applicable for most software).
Step 3: While reloading, unplug the Display Port and the USB.
Step 4: Then just re-plug the display port and USB.
The problem will be solved by this.
If the software is restarted, any critical issues with the VR software are usually fixed.
But if you are still facing the same problem, then go to this next solution.
-
Launching the VR Software as Admin
If you are facing a problem where the software is running well for a few minutes but then again it is crashing, then launch the software as admin, again. This is mostly used in the case of HTC Vive.
However, this step is not proven to be 100 percent effective.
-
Uninstalling all Graphics Driver Using Safe Mode
This solution is recommended by many users of VR headsets. They have claimed this to permanently fix the issue.
Follow the below steps:
Step 1: The first step is to uninstall the Oculus Software (for Oculus Rift S users)
Step 2: Then, remove All Oculus-related folders in %appdata% which includes local and roaming.
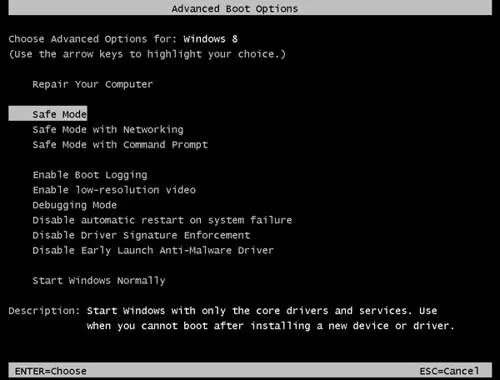
Step 3: Next, restart Windows 10 in Safe Mode.
Step 4: Uninstall DDU (Display Driver Uninstaller). This software is to uninstall all graphic drivers cleanly.
Step 5: Then, restart Windows 10 in normal mode.
Step 6: Reinstall all the AMD Display Drivers.
Step 7: Then just download Oculus Software from the official website and install it.
-
Unplugging VR headset and plugging it in again
This solution also fixes the random shutdowns of the VR software. It is also known to fix problems if your VR headset is not detected.
VR headsets have been designed very carefully with a lot of sensors that give you an experience beyond reality. To give you these proper VR effects, the device has been built with many cables. These cables may be lost or not perfectly plugged in.
Follow the below steps to fix the issue:
Step 1: Remove the facial interface from your headset, carefully. This will allow you to access the cable.
Step 2: Unplug the cable from the headset and then wait for five seconds.
Step 3: Next, insert this cable and the facial interface back into your headset.
Also check: Roblox Controls For Beginners
And you’re done!
Endnotes:
It should be noted that VR headsets should always be properly checked before buying them. Most people do not do this and buy it right away. You need to check if bright background lights are flushing away the headset light and also if the lenses are clean or not.
Hope the above solutions fix the VR Black Screen glitch you are facing. Keep following TechzPod.com
![How to Fix Discord Notifications Not Working? [Easy Fix Android & PC] Fix-Discord-Notifications-not-Working-on-Android & PC](https://techzpod.com/wp-content/uploads/2022/03/Fix-Discord-Notifications-not-Working-on-Android-PC-150x150.jpg)
![How to download Roblox on PS4? [Easy way to play Roblox on Playstation] Roblox-on-PS4](https://techzpod.com/wp-content/uploads/2021/06/Roblox-on-PS4-1.webp)
![How to Change Your Birthday on Roblox? [Easy Ways] How to Change Your Birthday on Roblox? [Easy Ways]](https://techzpod.com/wp-content/plugins/contextual-related-posts/default.png)
![[FIX] How to Fix Discord not detecting Microphone? (8 Fixes to Try) Fix-Discord-Not-Detecting-Mic-issue](https://techzpod.com/wp-content/uploads/2022/02/Fix-Discord-Not-Detecting-Mic-issue-150x150.jpg)
Leave a Reply